-
How to Build a Stable and Flexible Tower Side Mount Fixture
Published: Friday, July 4th 2025 02:25:05 PM - EDT
Updated: Sunday, July 6th 2025 02:05:32 PM - EDT
Written by: jbick
Category: ELECTRONICS
Showcasing how I built my own, home-made, tower mount fixture. My own fixture is very affordable and has lasted 3 years now. Very helpful for mounting additional antennas on tower without actually having to climb to the top of the tower.
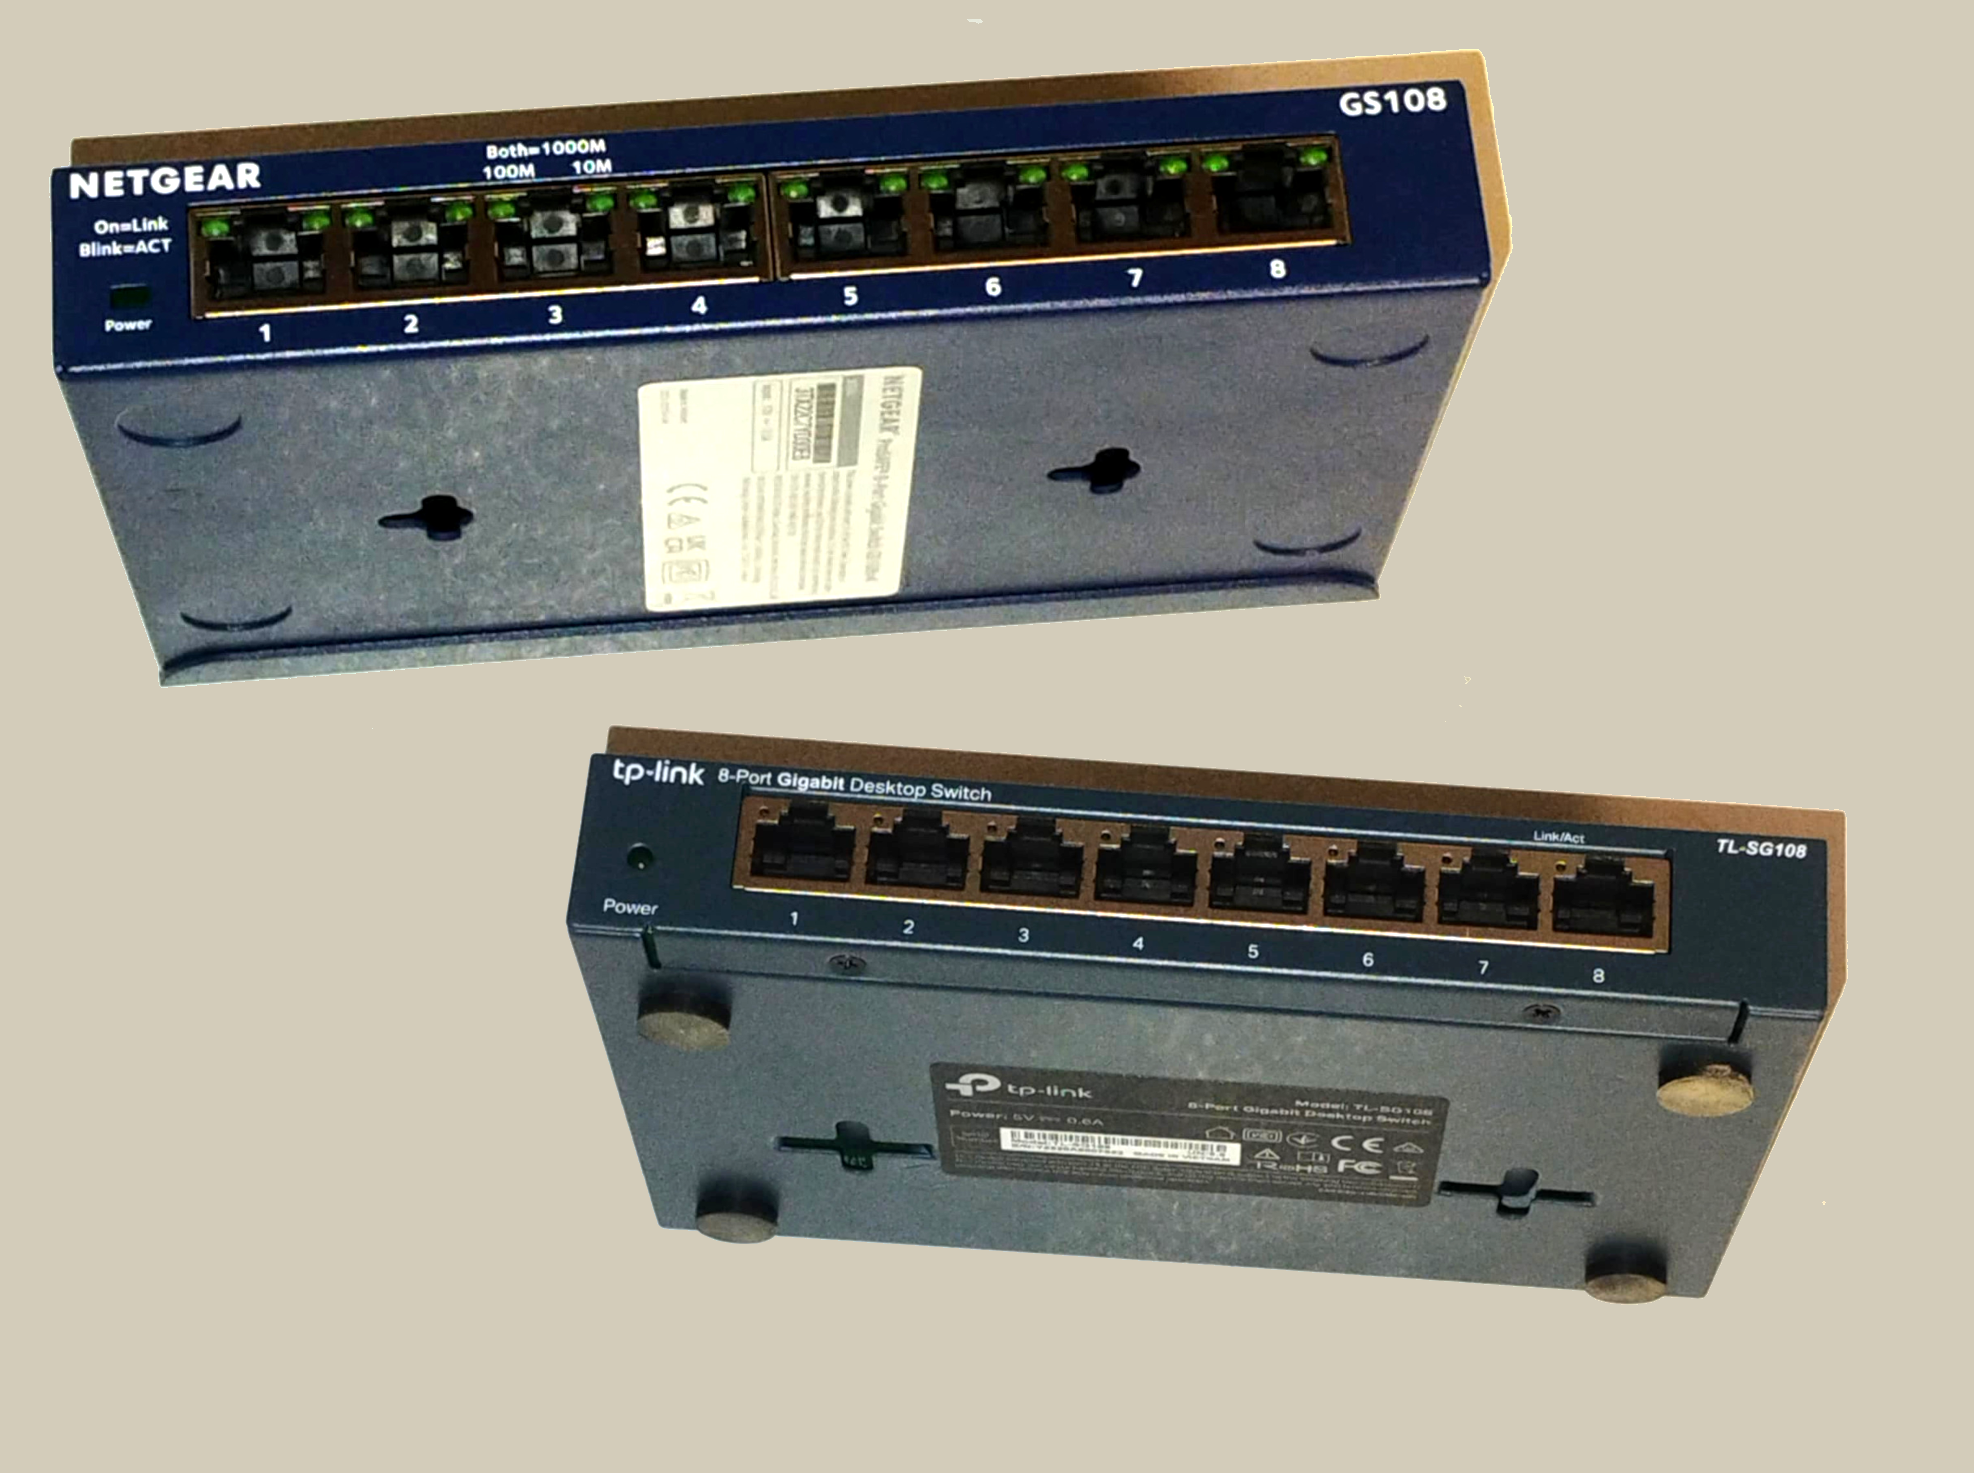
Buy Featured Items
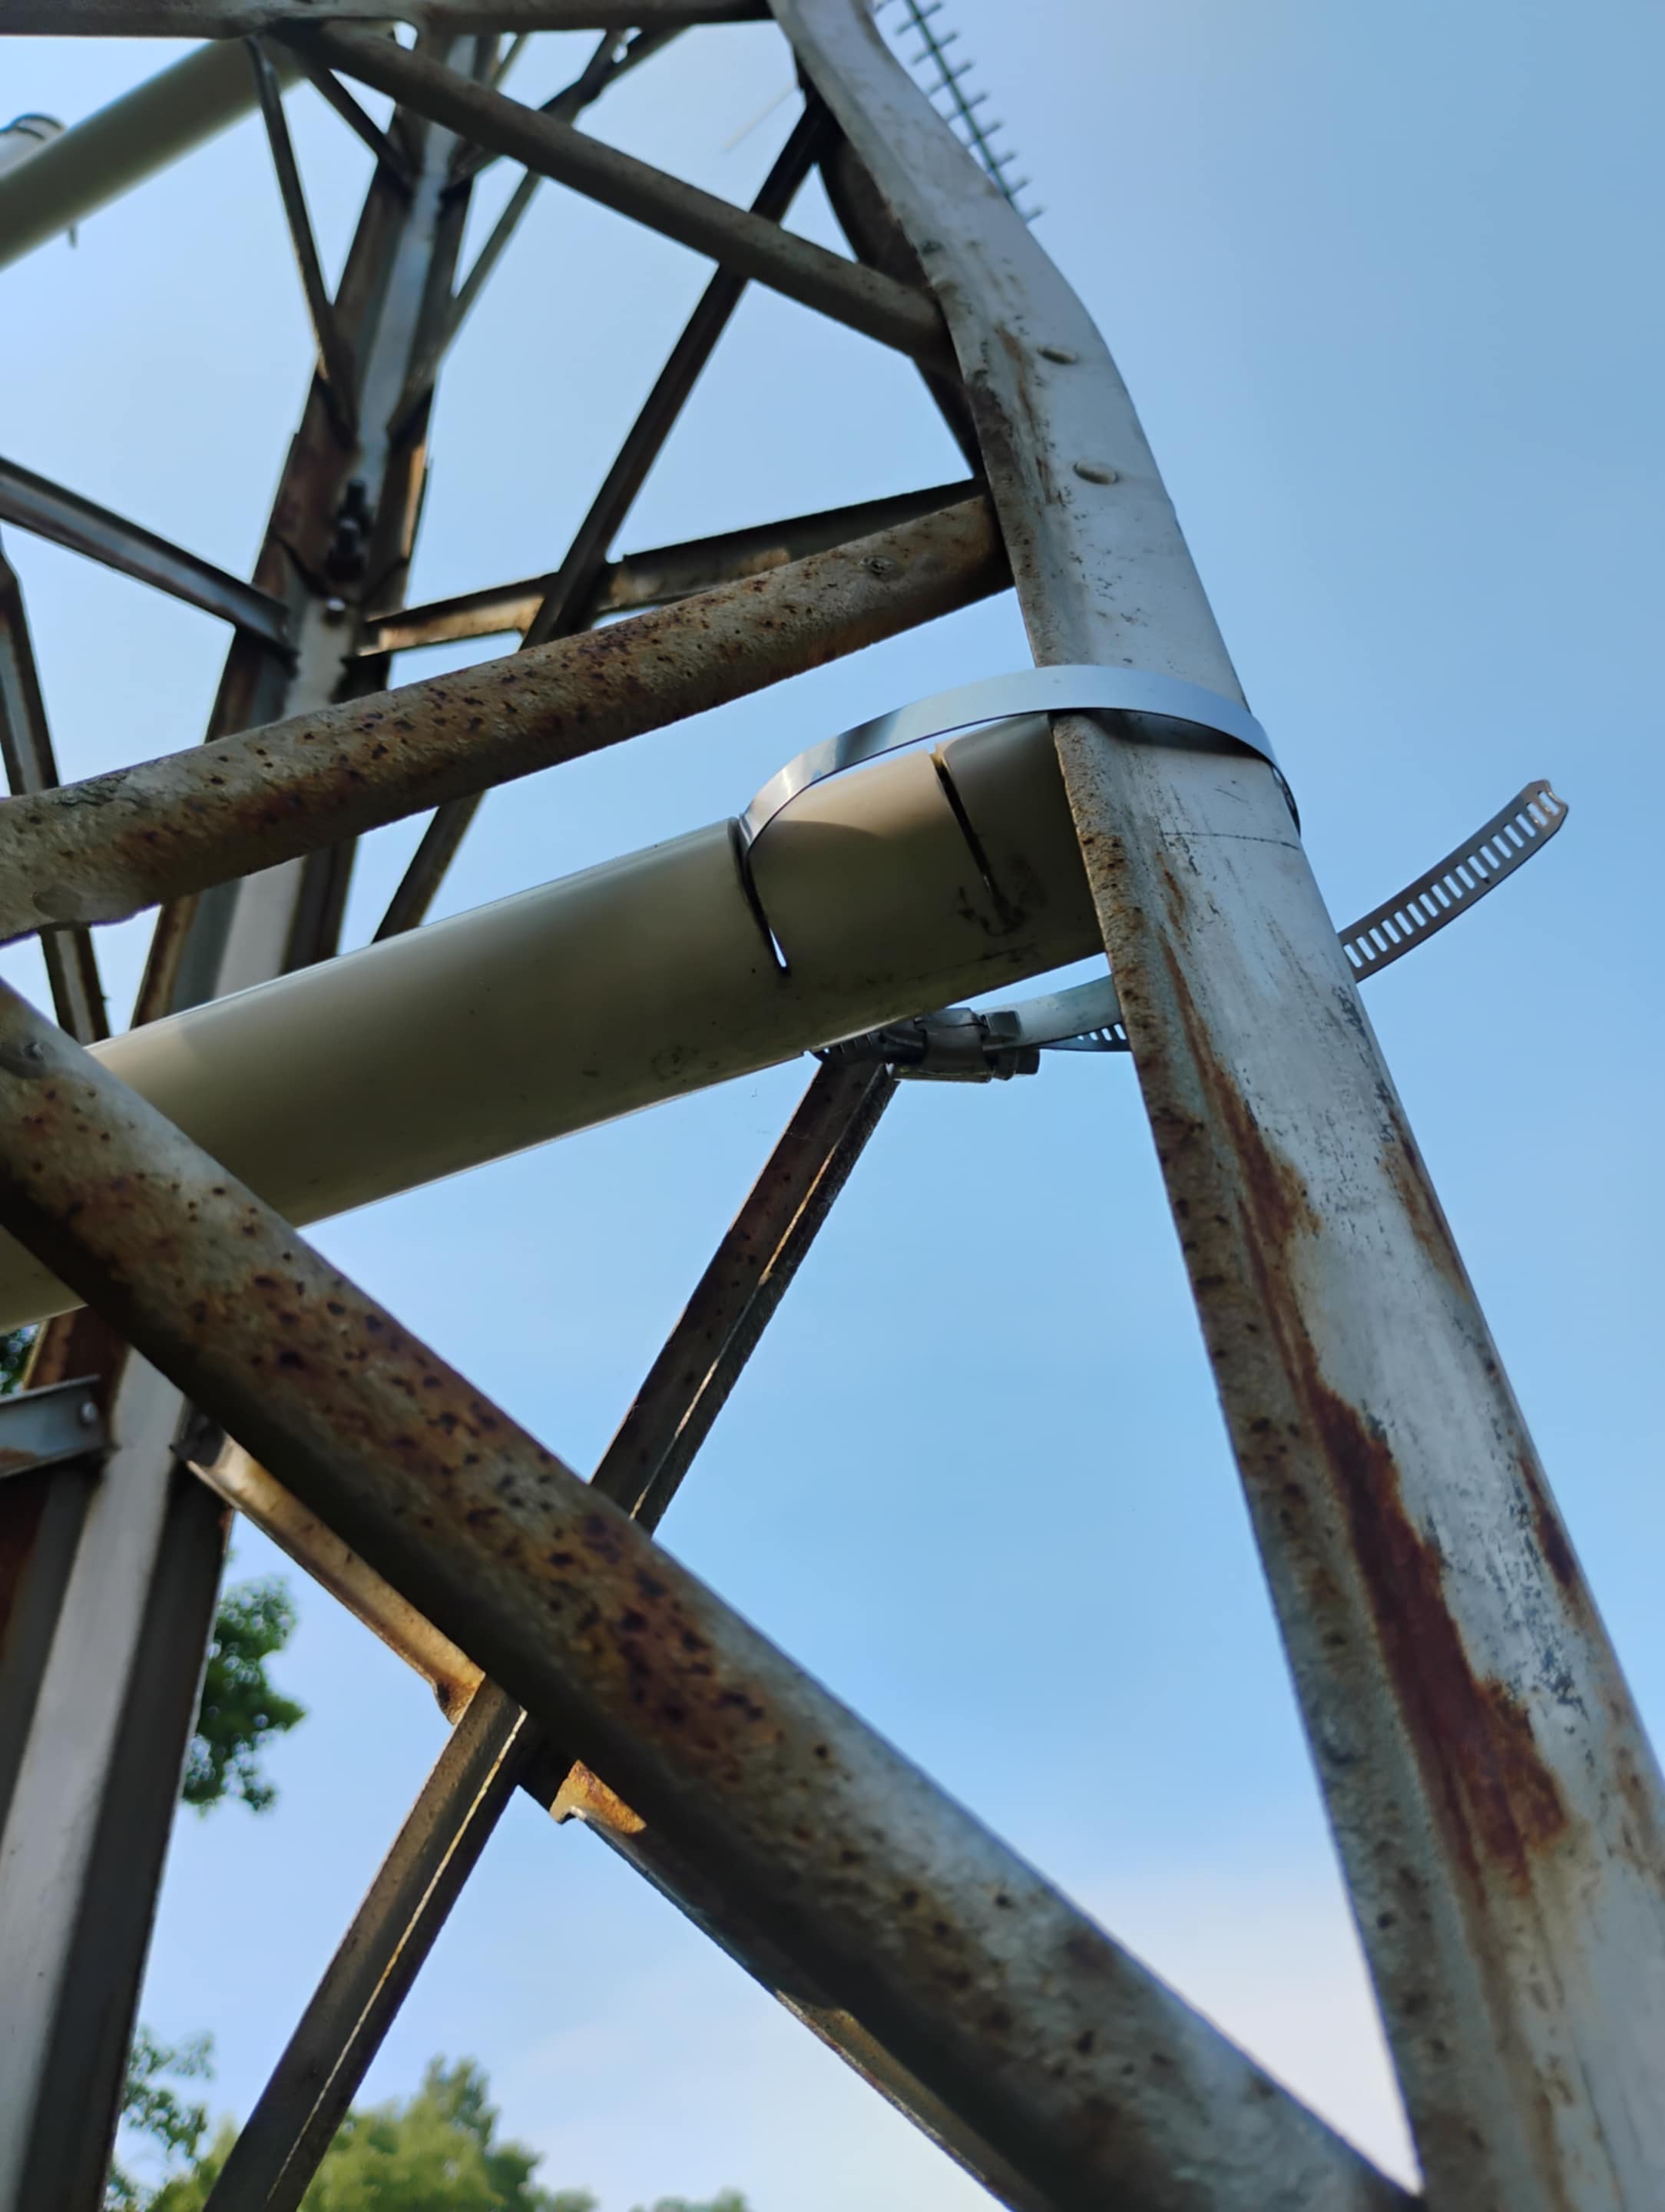
There are a handful of options out there for tower side mounts. Some can get quite expensive and can be lower quality than just building your own fixture with your own hardware, like I did. This is quite simple and consists of hose clamps, 2" long bolts, 1.25" PVC pipe and PVC fittings.
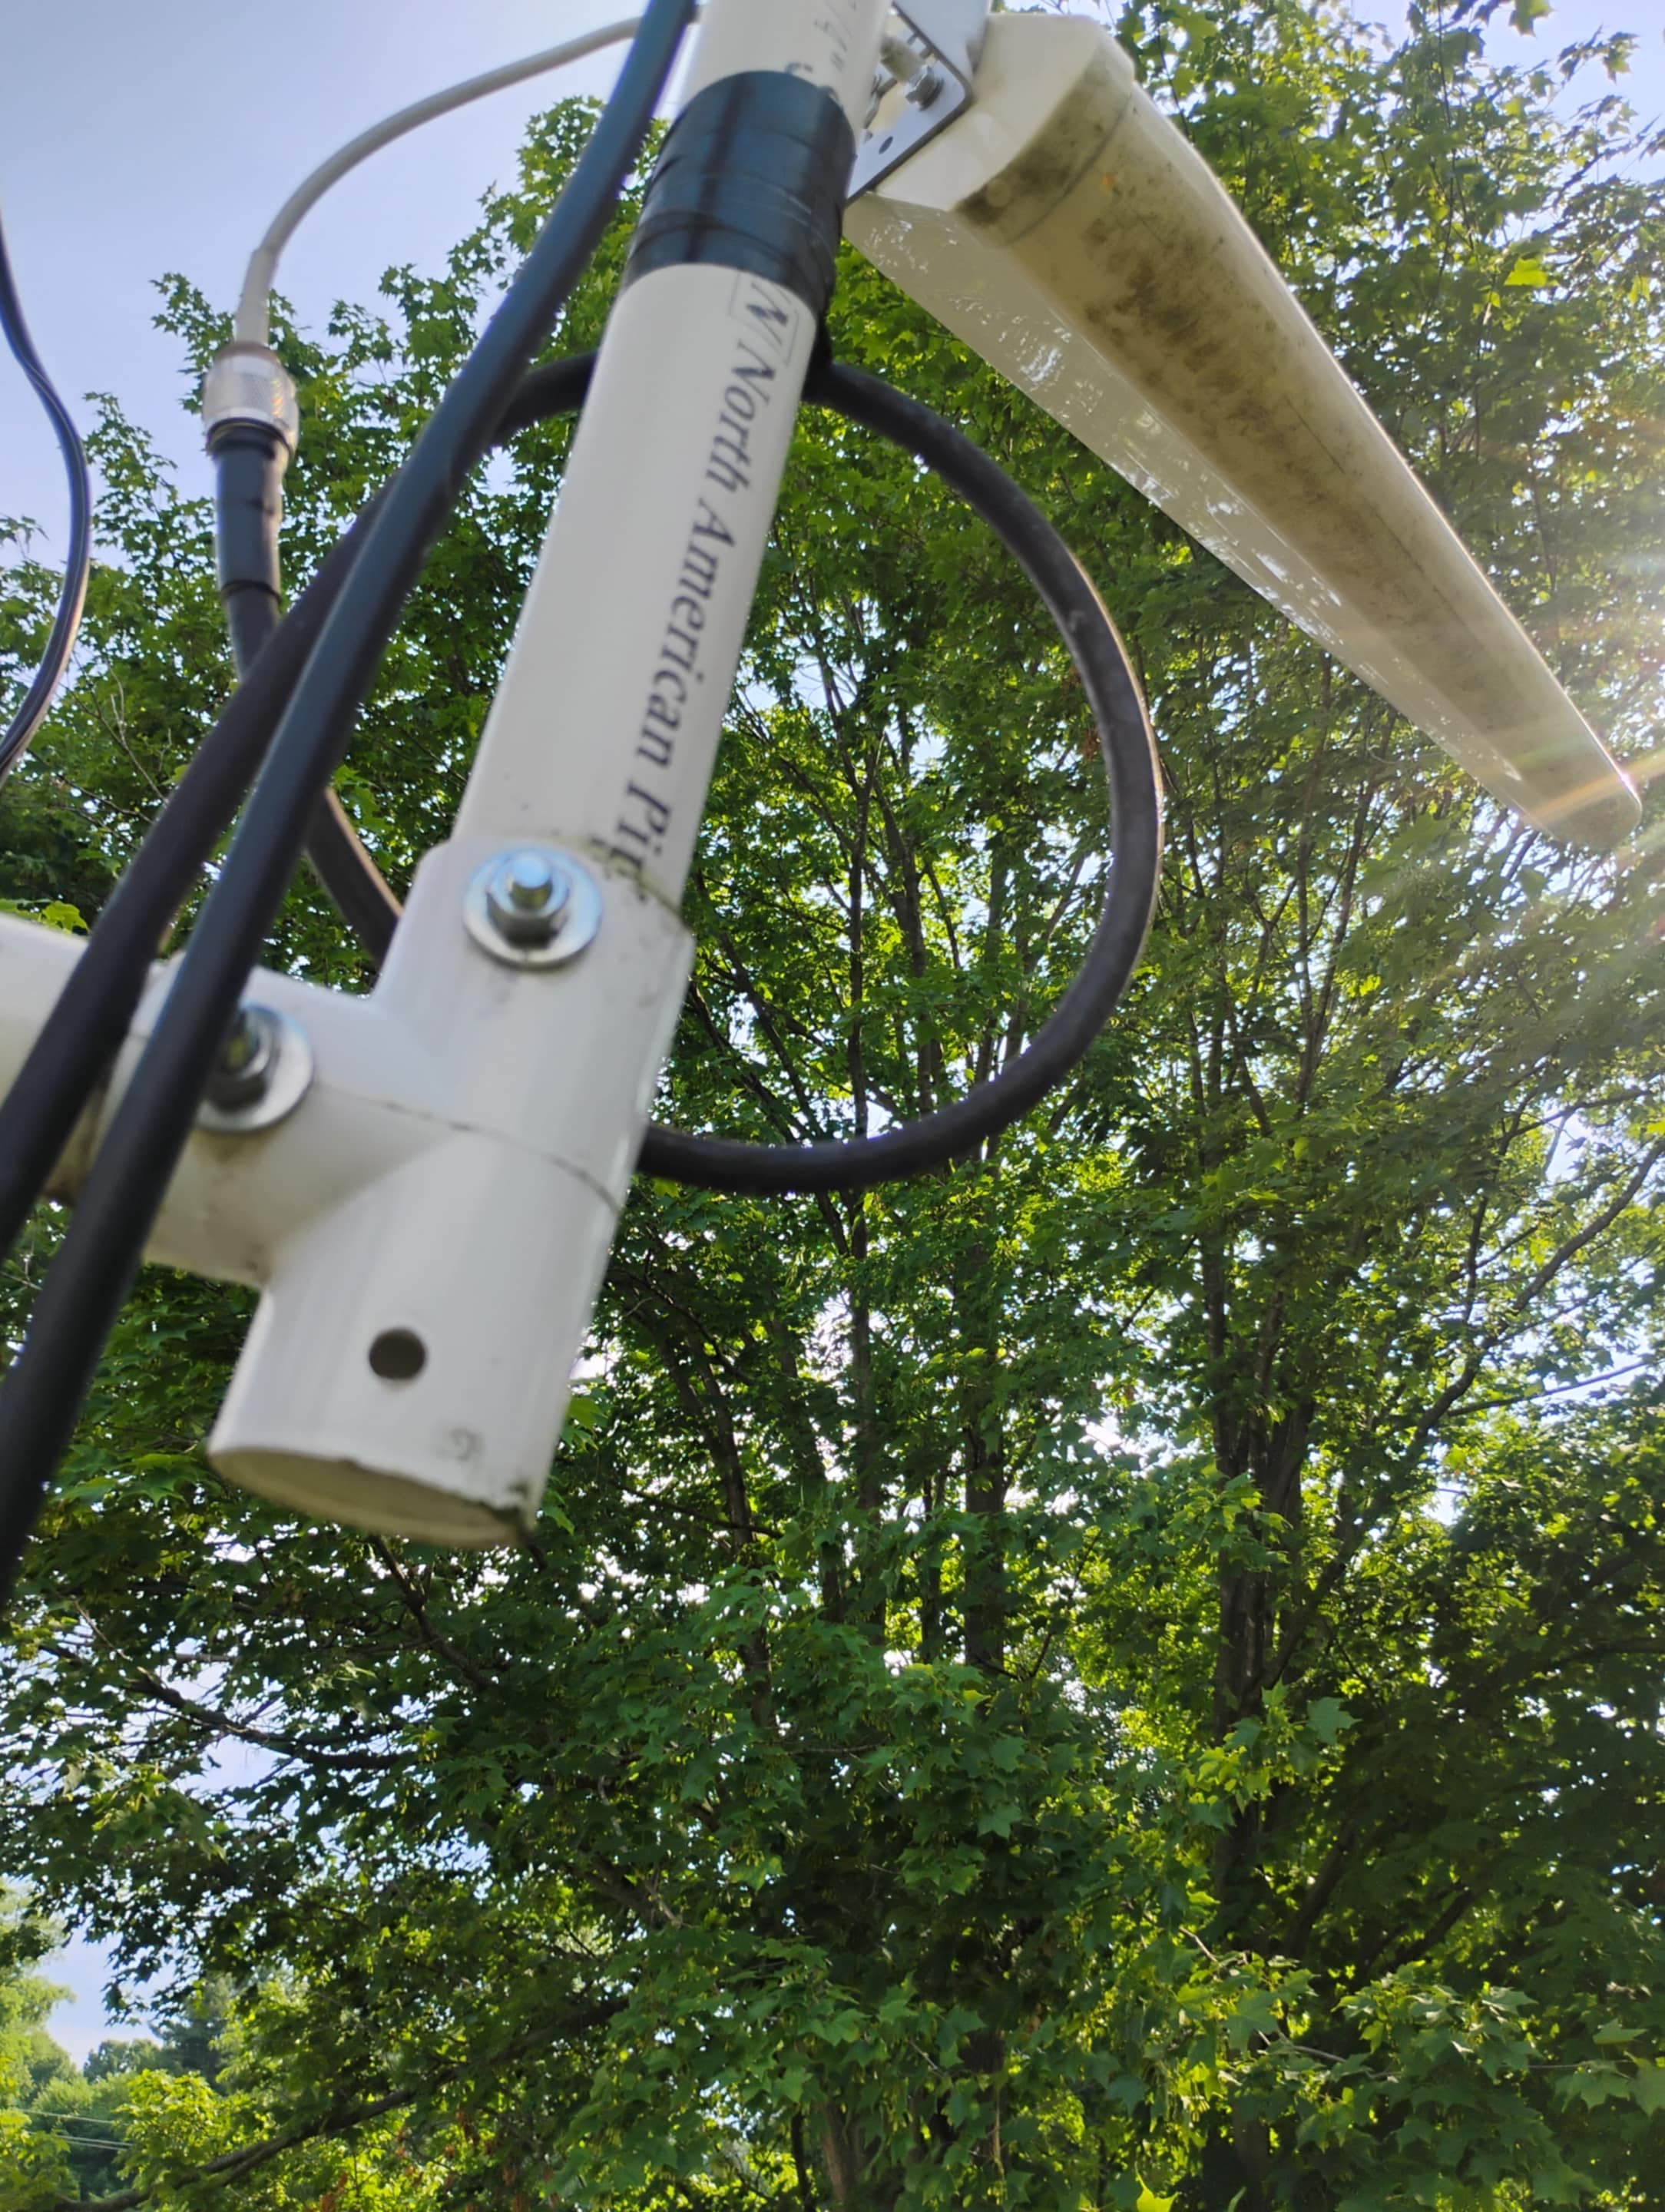
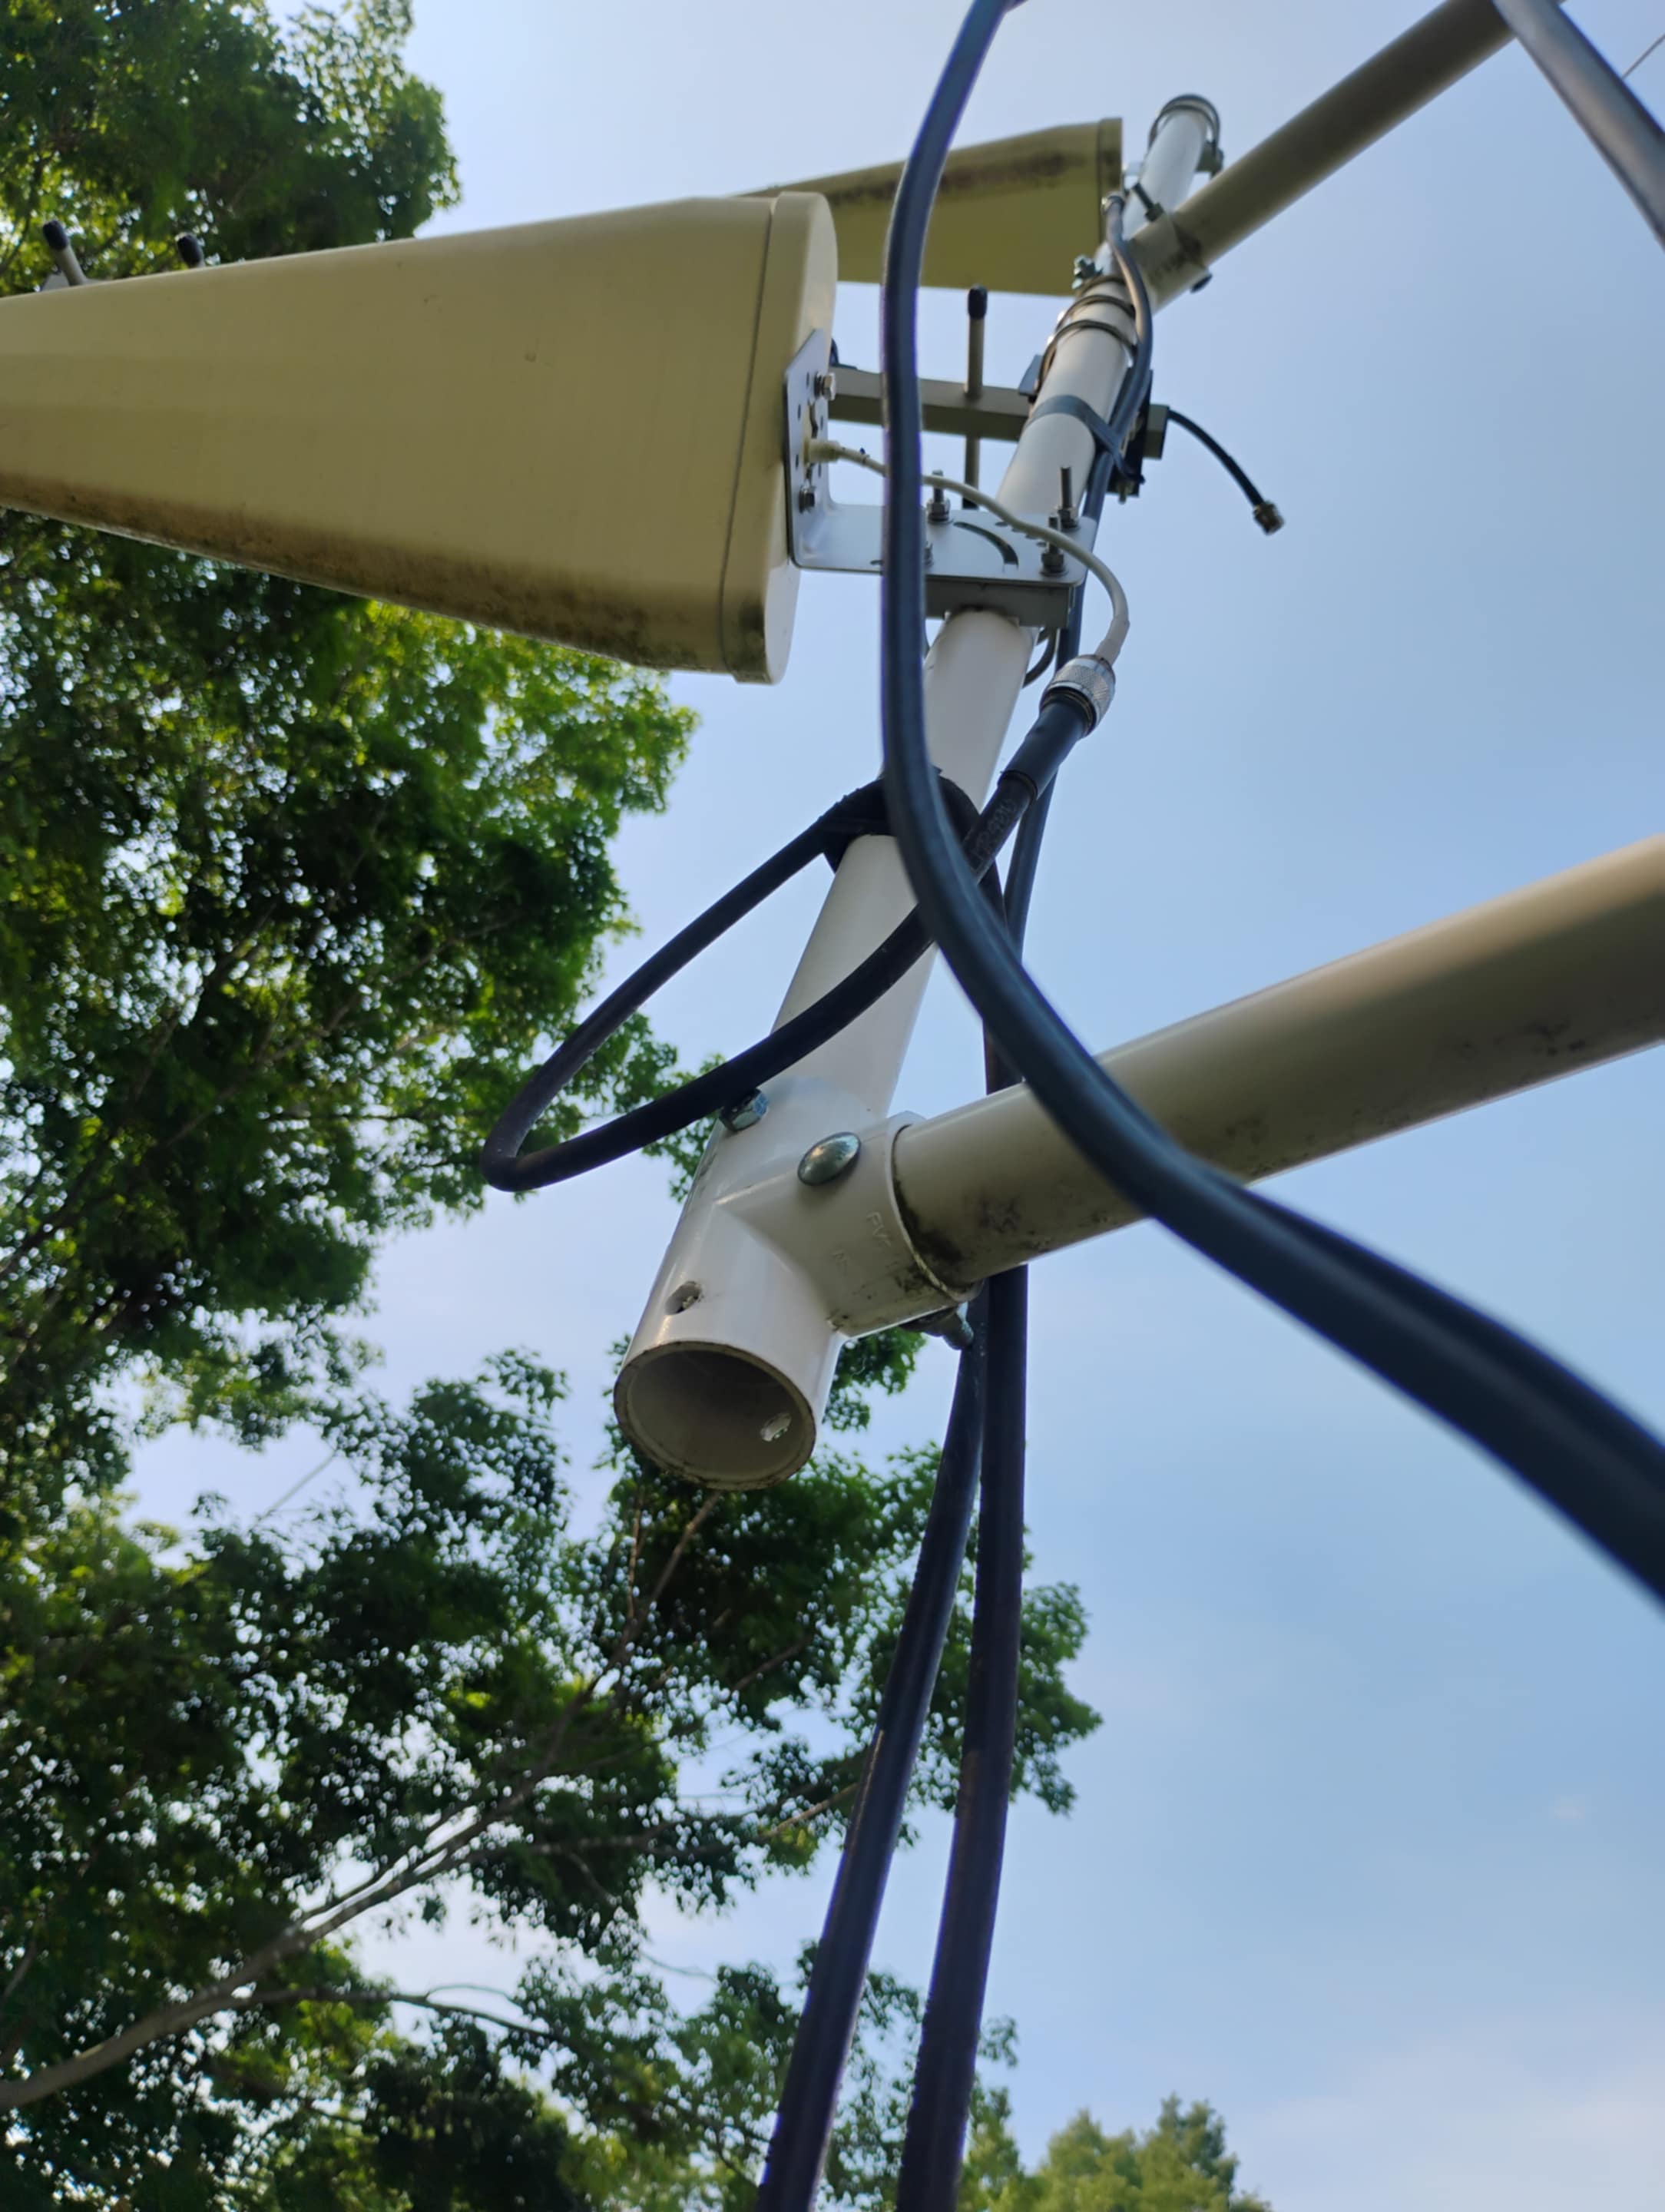
The fixture I built and put in place, as pictured, hosts 3 YAGI antennas. It's actually a substantial amount of weight and saves me from having to climb to the top of the tower. Although I could climb the tower and have there's simply not enough space at the top for additional antennas.
The intention with the YAGIS was to get better signal from an AT&T cellular tower that is 5 miles away. While that worked just fine we since got fiber optic internet which made the need for cellular data irrelevant. However, with the yagi's still in place, they could be used for achieving long distance WiFi outdoors since they cover 600 MHZ up to 3 GHZ.
Materials to Build
I happened to have PVC tubing laying around that I could utilize for a tower project. You essentially form 3/4's of a square with your PVC pipe and fittings then the fixture can kiss right up to the tower.
With the notches drilled at the end points with a cut-off wheel you can slide the hose clamp through the pipe, around the tower angle then tighten up the clamps. In my case, I made multiple notches so I can use the best one when it comes time.
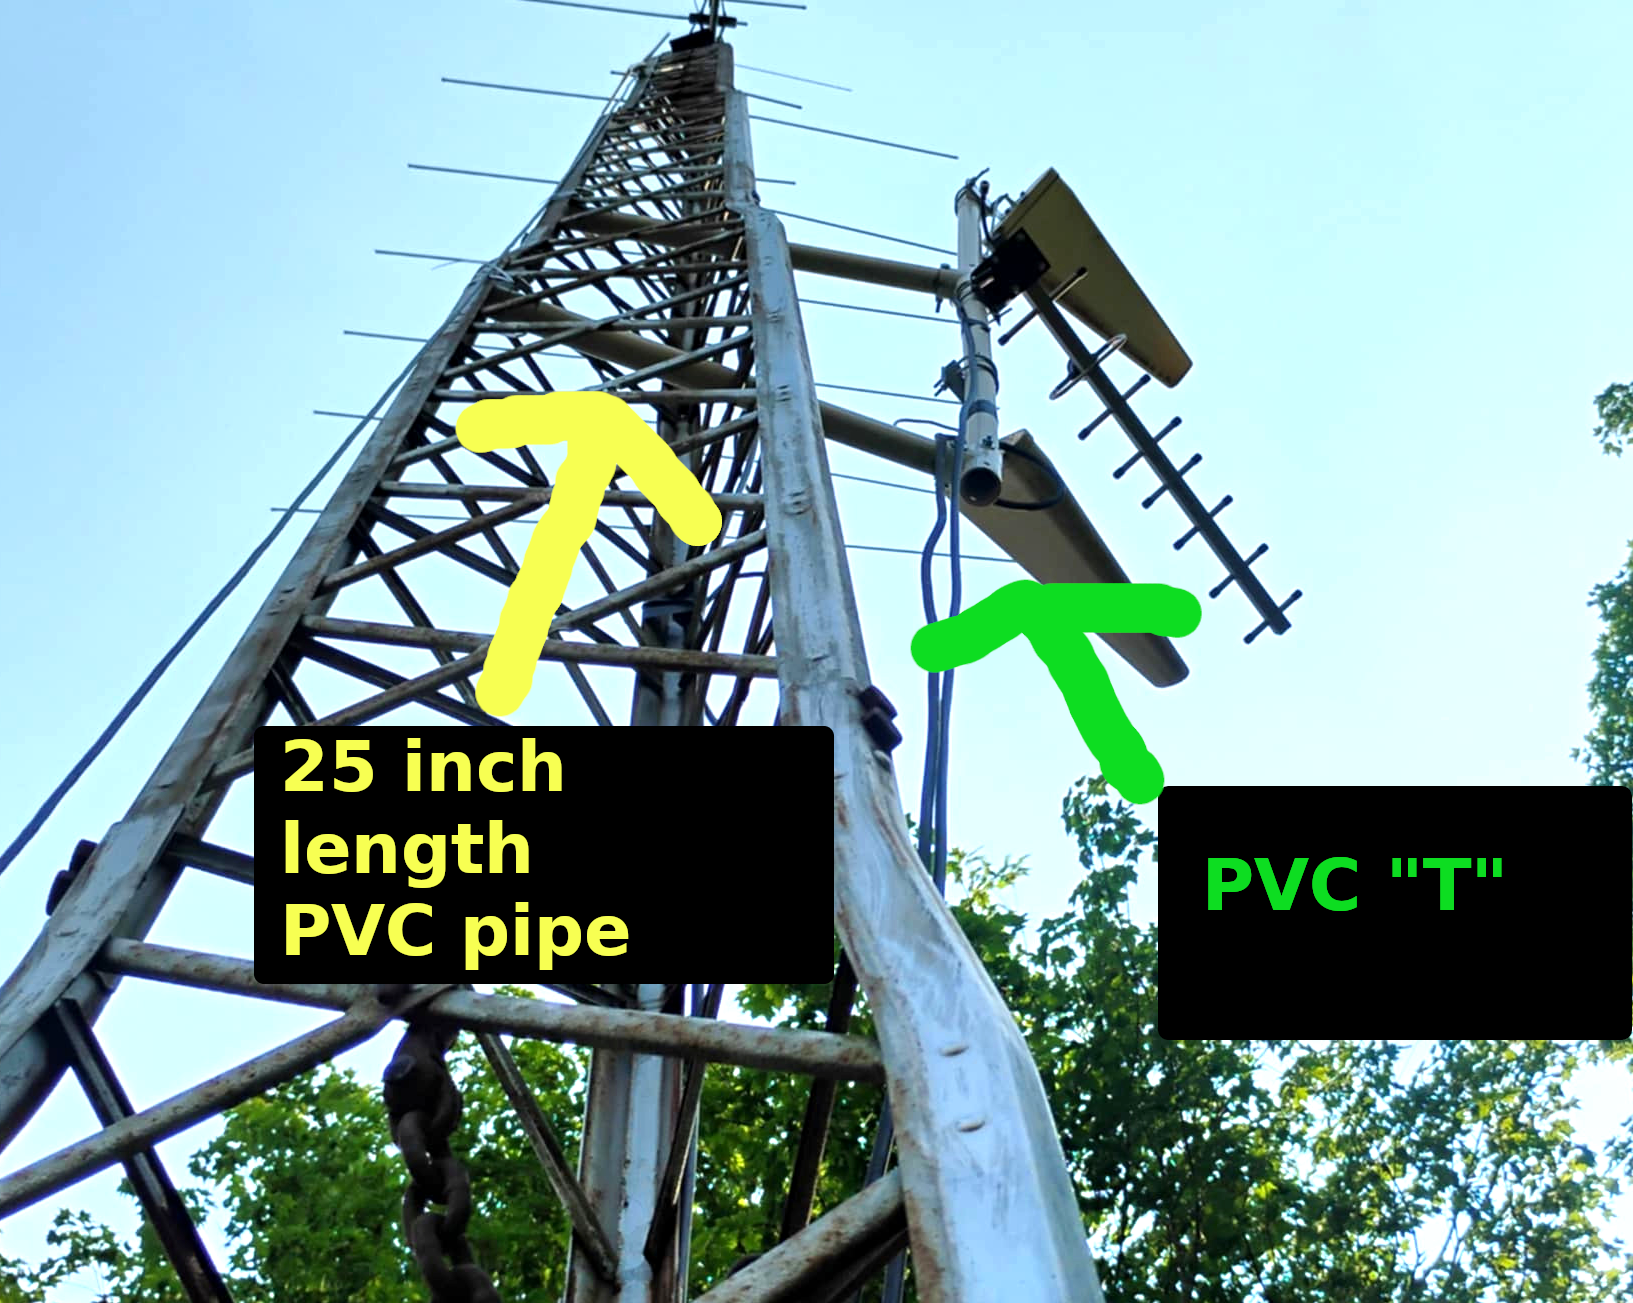
- 1-1/4" PVC pipe. The two main legs cut into 25" long pieces to give enough distance from the tower itself.
- 1-1/4" PVC Tee fittings x 2.
- At-least 2 two inch long bolts. I drilled holes into the PVC and used nuts/bolts to hold the pipes together. This was cheaper than using glue/primer and makes it so I can dissassemble the fixture at anytime without having to cut new pipes.
- 2 x Hose Clamps.
Mounting the Fixture to the Tower
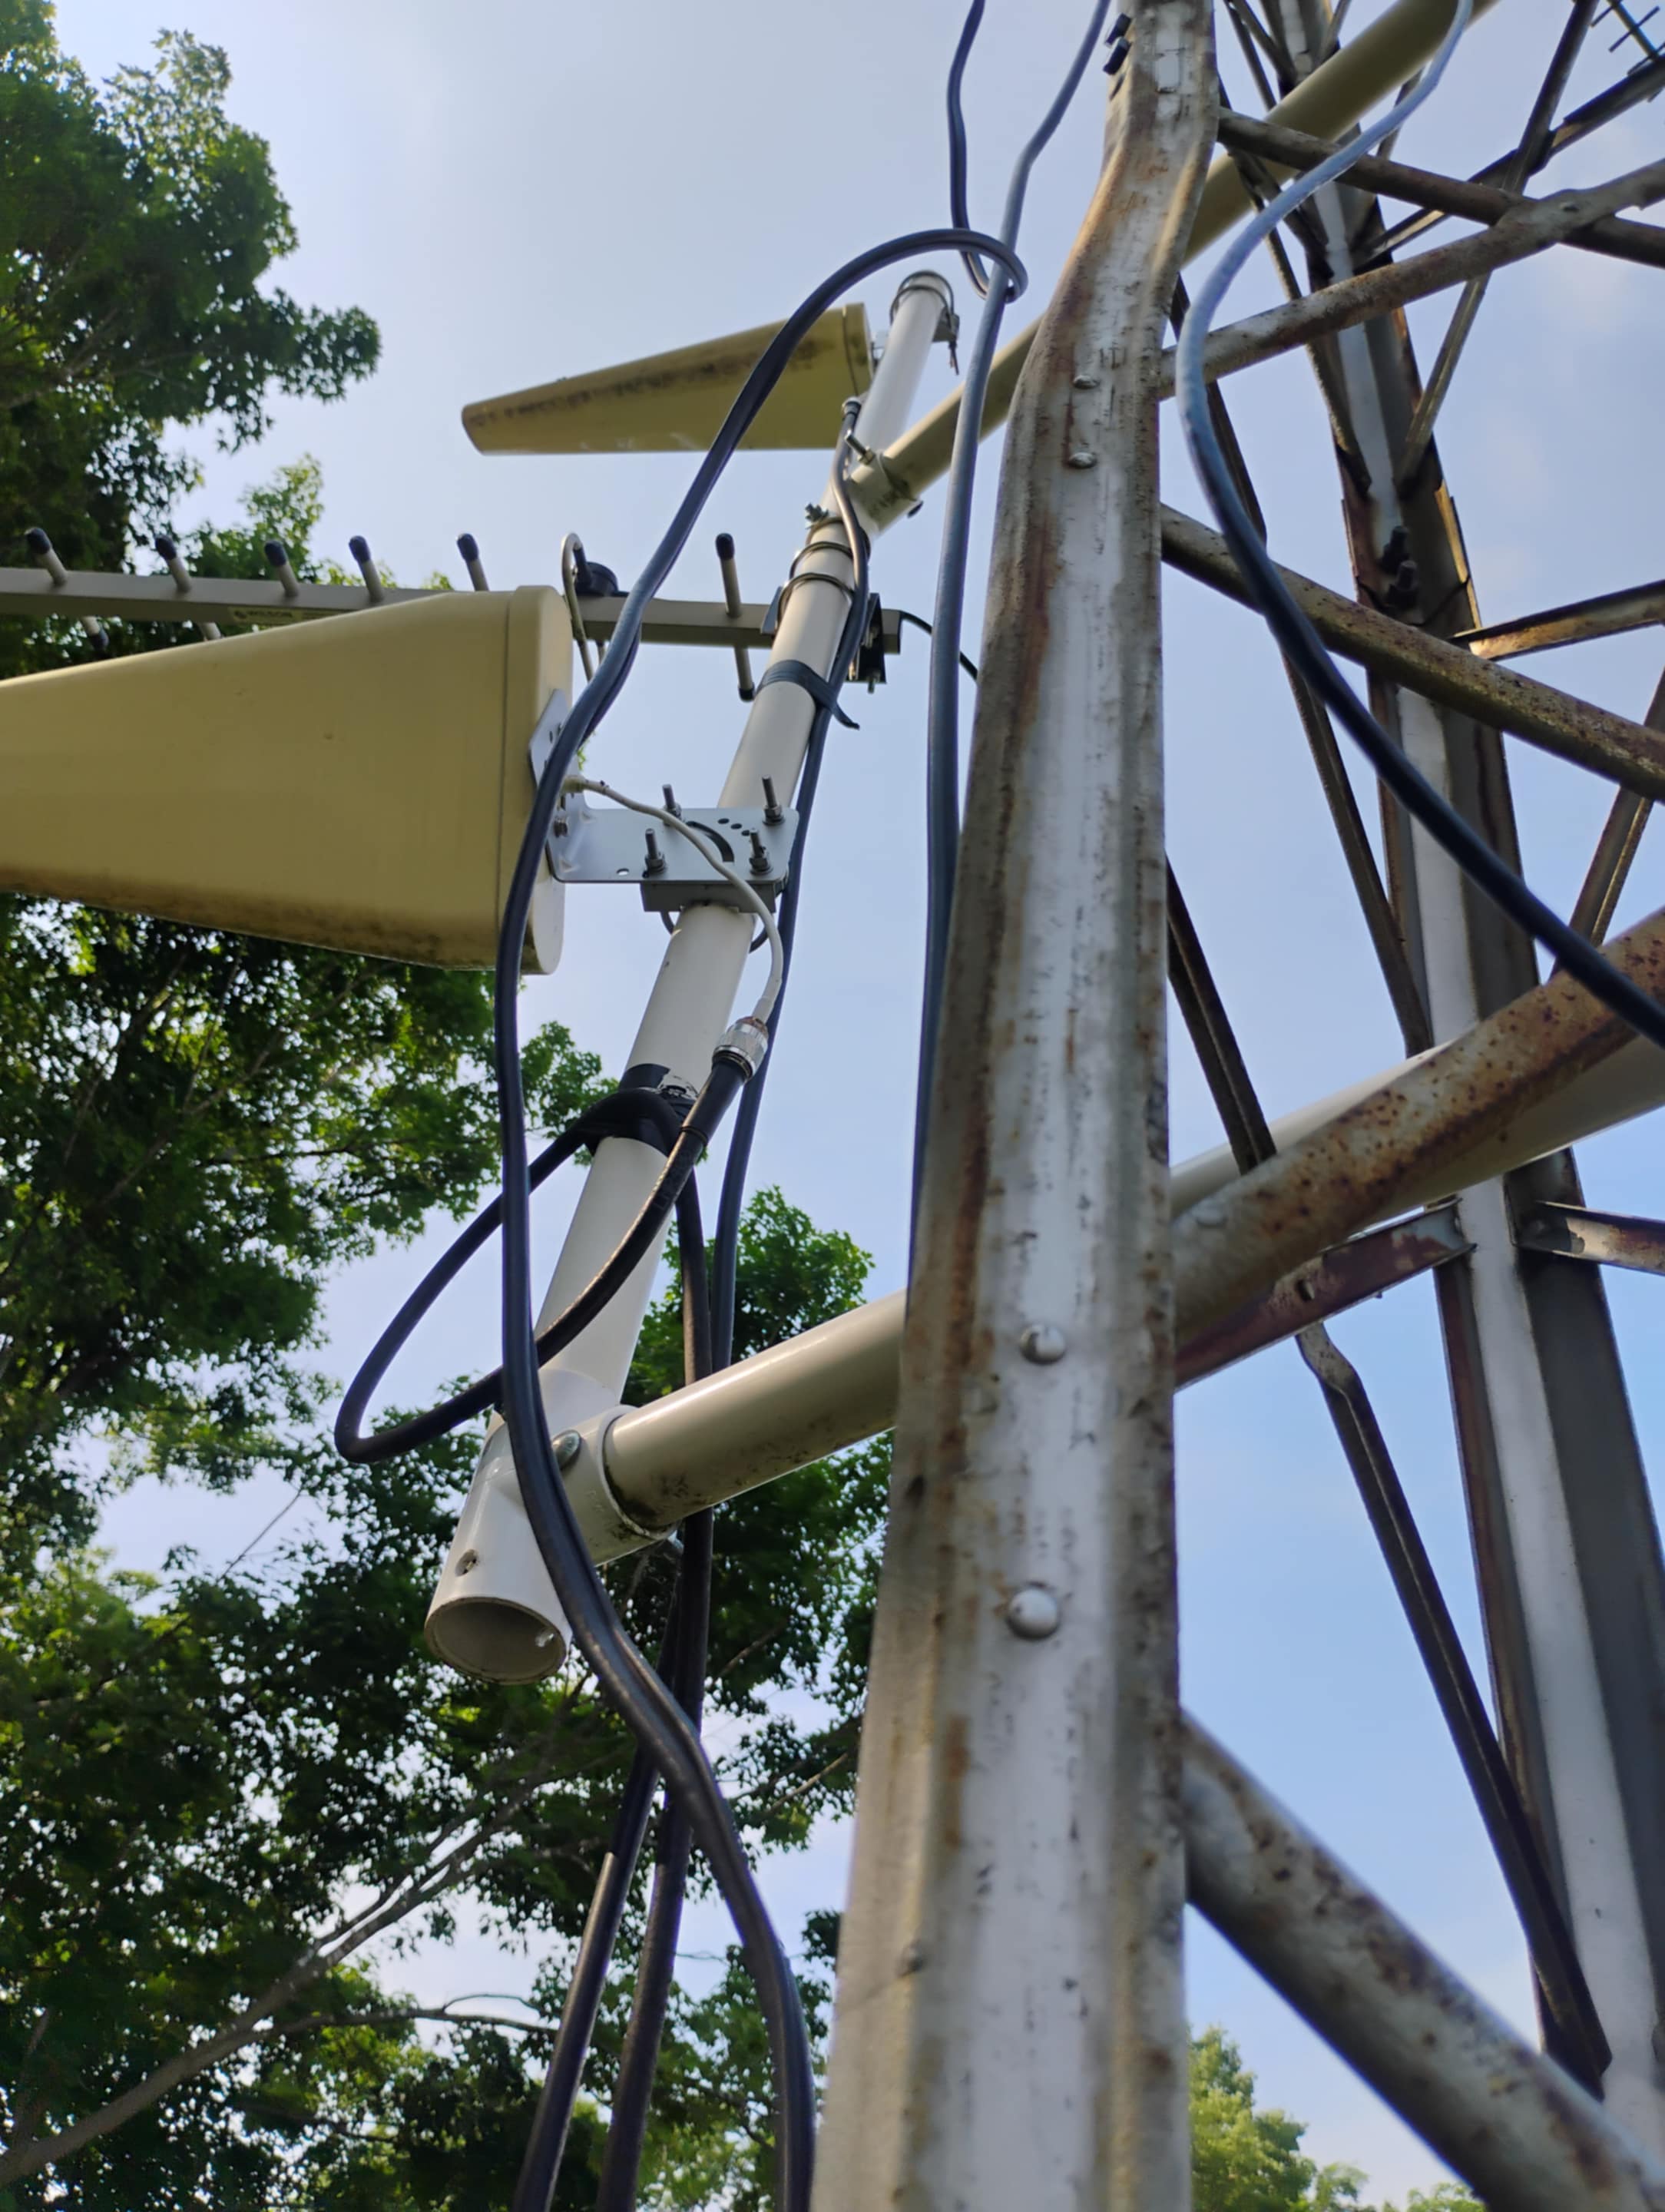
I have a heavier duty tower that is sold in 8 foot sections. The tower declines in width with each section. It is build out of angle iron with cross member bars rivitted on. The cross members essentially form an X shape between the angle irons.
Although my fixture design was intended for my tower, I think it could work for other tower models such as ROHN. Any tower with cross member bars, be it welded or rivitted should work with this fixture.
After I built the fixture I was able to climb the tower with the fixture and rest it within the cross member bars on the way up. My fixture is mounted approximately half way up the tower.
The fixture essentially rests on the cross member bars, with the ends of the fixture's legs butted up to the tower. Considering the fixture is built out of PVC and is held together with nuts and bolts - that gives the fixture some level of flexibility. With that flexibility you can adjust the legs up or down to fit in between the top cross member and bottom cross member.
What the Fixture Can Hold ?
In my case I have three antennas on the fixture. All yagi's, however since the fixture is built with "T" PVC fittings I was able to slide a 2' foot long piece of pipe into the top of the fixture. Essentially a free standing pipe.
Any omni-directional antenna could be placed on the top - so long as the fixture is far our enough from the tower and the pipe is secured with a bolt.
While omni directional antennas could be placed on the top I would not put to big of an antenna on the top as the fixture could get flimsy however any 2 meter antenna up to ghz antenna would likely workout fine.
Concerns about Using PVC to mount stuff
When I was into amateur radio, a handful of concerns were brought up about using PVC to mount antennas. Firstly, the antenna will loose any grounding to the tower as plastic does not conduct electricity.
Secondly, it was voiced that the PVC could melt under direct sunlight and break. While this is entirely possible the fixture has enough support -- without just being a long pipe flopping around in the wind.
Tower Accessories: Links
Related ELECTRONICS Posts
-
Pages
Home Page
About BP
Submit Review
Now on The GRR
Listen Now: BetterPart's own Internet Radio station is Hillsdale's Good Rock Radio The GRR!
-
 Better Parts
 -